Why does my car feel peppier in the cold mornings? Why do racers run better times in cooler weather? There is one simple answer to these questions. Cooler is better. Colder air is more dense then hot humid air. Therefore the cooler air has more oxygen for any given amount. The more oxygen in your engine, the more combustion, thus more power. To gain this edge a simple, cheap intake can be made in your own driveway to provide your engine with cooler air, and more horsepower.
You will need the following:
- Cone filter
- (1) 90-degree bend 3.5in to 4in (or whatever size you chose) PVC pipe
- One foot or so straight PVC pipe of the size you chose
- (1) 90-degree bend PVC pipe
- Assorted PVC fittings, a closet fitting, depending on your filter
- Screws, small nuts and bolts for the closet fitting
- PVC cement
Instructions:
- If you haven't already, remove your air silencer, but instead of reassembling the car, keep the splash guard off, and the air box open. You must remove the silencer for this modification. If you already removed the silencer, open up the splash guard and the air box as described in the air silencer article.
- Disconnect the air box lid. Look on the inside of the air box lid. There are three 8mm bolts. Remove these. Next, loosen the rubber claps that are holding the MAF to the air box. Slide the air box lid off. You will need the rubber fitting later on so set it aside.
- The bottom part of the air box should already be unbolted, since you already removed the air silencer. So just remove that from the car.
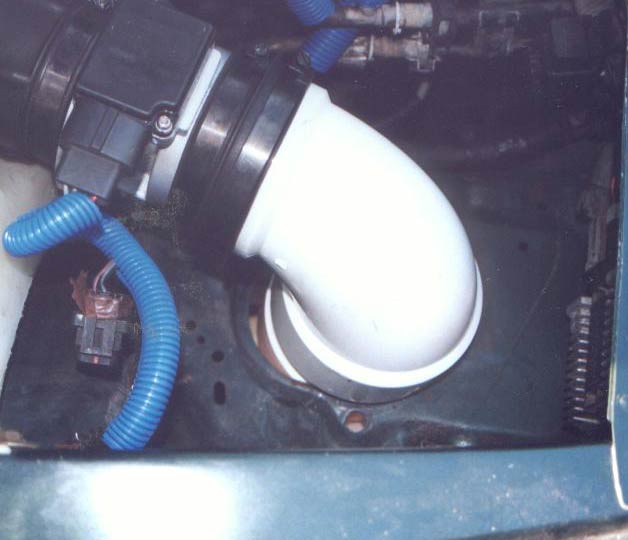
- Attach a 3.5in to 4in 90-degree elbow to your MAF. The 3.5in side will fit right up to that rubber fitting you removed earlier. You will also want to double check your measurements here for the proper size tube. The MAF will be different on each application. You may also choose to use a smaller pipe then 4in. You will need to do some grinding later on with this big of a pipe. So you may want to use a 3.5in, or 3in pipe.
Click for photo of top half of intake.
- Trace around the outside of the elbow above the intake hole. You will see 4in is a little large. Push the intake aside and take out your trusty Dremal and grind out the hole a bit.
- Fit a 4in section of 4in pipe into the elbow for a fitting. Now, fit it into the hole. Inside the fender attach a 90-degree 4in elbow.
- This is where you will have to do some work of your own depending on the kind of cone filter you purchased. If you have a universal fit cone, you may need to come up with a series of reducers and attach them to the elbow. I went the true economical way and picked up a used cone filter from a 2000 Mustang. Follow the next directions if you chose this route.
- Pick yourself up a PVC fitting called a closet fitting. It has a metal ring around the pipe.
- Mark on the metal filter plate three or more different holes that correspond with the fitting and drill them out.
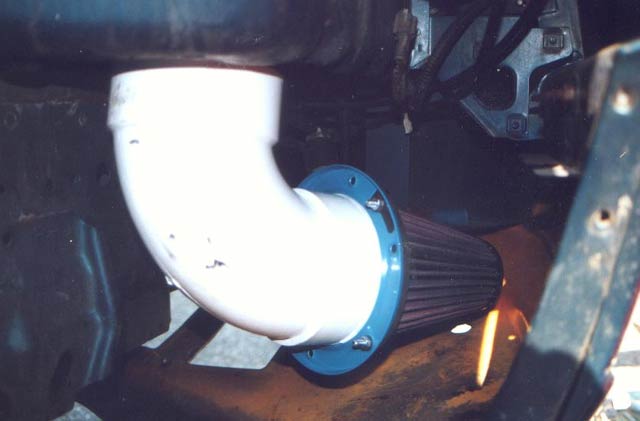
- Find some hardware and bolt the filter to the closet fitting. A very good seal will be formed thanks to the foam around the base of the Mustang filter. Proceed with the rest of the steps.
- Attach your filter setup to the 90-degree elbow using another 4in piece of pipe. Now, your setup should be completely together.
Click for photo of bottom half of intake.
- Before you go back and cement that pipe together, make sure it fits under the hood, in the fender, and behind the splash shield. It also may be a good idea to paint it. That white pipe really stands out.
- Glue the PVC together except for the last fitting before the filter. This way you can have more mobility when removing the filter. Put a set screws where decide not to glue. Go back and tighten the rubber fitting between the MAF and your first elbow.
- Replace the splash shield, and the wheel.
- Start it up and go for a spin. It may be necessary to remove your negative battery cable so the computer can learn the new higher flow of air.
There is some concern over the stability of the PVC pipe in the heat of the engine compartment. The piping will be far enough away from the engine not to cause any problems. I have used this set up for some time and have had no issues. Although, if the heat does concern you, spend the few extra bucks and pick up the higher heat PVC pipe.
The total cost of this project for the pipes, hardware, and filter came to about $50. If you purchase a new filter it will be a bit higher. But the best source for these cone filters cheap is the Mustang message boards, 3.8 Mustang. People there are selling used K&N filters that can be modified for this project for under $30 shipped. Years that the Mustang cone filters are applicable: 1999-2003.
* Note: in the photos, the straight PVC tube is used as connectors. One piece is between the two 90-degree elbows, and the other piece is right before the filter. It's not noticable in the pictures, but the pipe is used to join the sections of the intake together.
|